Comprehensive Guide to Setting Up Your Logitech K520 Wireless Keyboard
Introduction
The Logitech K520 wireless keyboard is a popular choice due to its sleek design, ease of use, and advanced features. Whether you’re a tech enthusiast or a novice, setting up this keyboard can be done seamlessly. In this guide, we’ll walk you through every step to ensure your Logitech K520 is ready for use, from unboxing to troubleshooting common issues. By the end of this guide, you’ll have a fully functional keyboard tailored to your personal preferences.

Unboxing and Preparation
Once you receive your Logitech K520 wireless keyboard, the first step is unboxing. When you open the packaging, you’ll find the keyboard itself, a wireless receiver, a pair of AA batteries, and a user manual. Carefully remove all items from the box to avoid any damage. Ensure you have a clean and organized workspace to keep track of each component.
Initial preparation is crucial for a smooth setup. Verify that you have all the necessary items and read through the user manual for any additional manufacturer recommendations. This preparation phase sets the foundation for connecting and customizing your new keyboard.
Connecting the Receiver and Installing Batteries
Next, you need to connect the wireless receiver and install the batteries. Here’s how:
- Locate the small USB receiver that came with your keyboard.
- Plug the receiver into an available USB port on your computer.
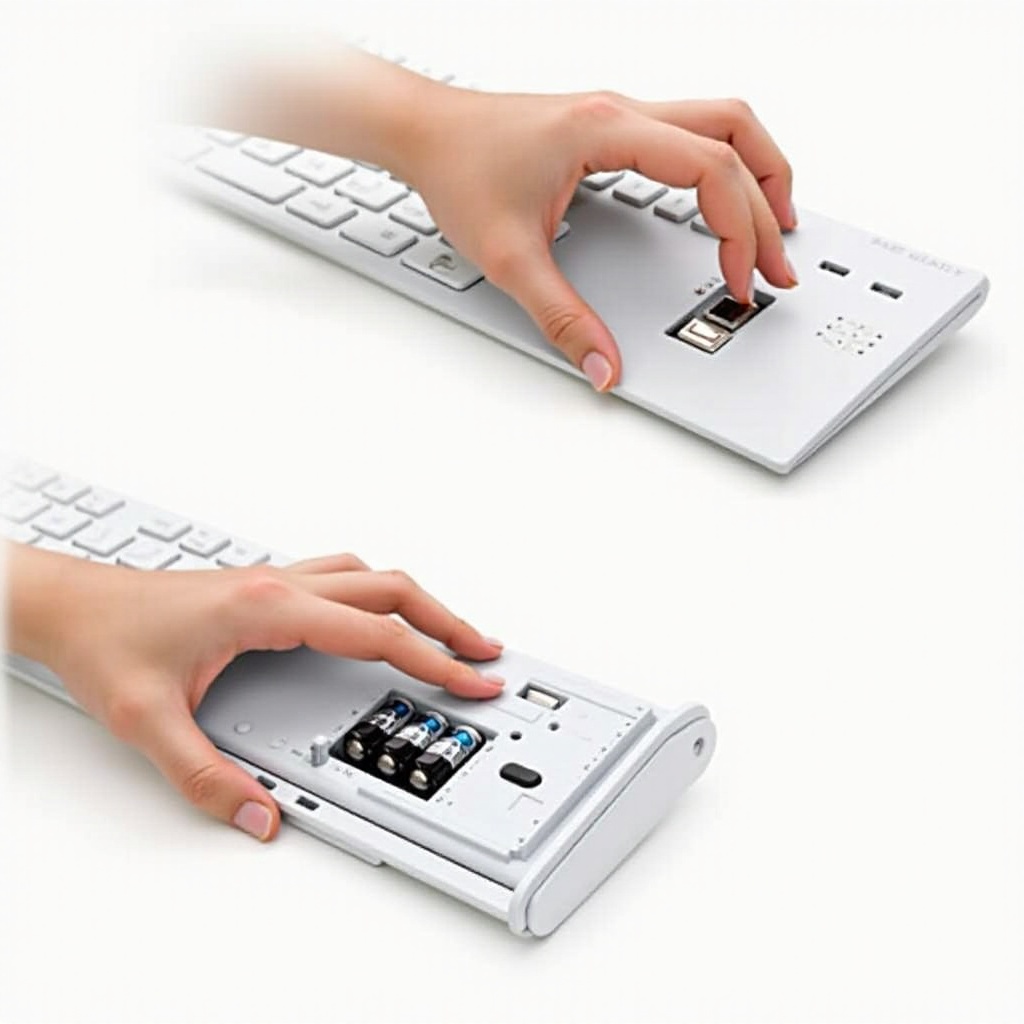
- Open the battery compartment on the underside of the keyboard.
- Insert the AA batteries, ensuring they are placed in the correct orientation indicated within the compartment.
- Close the battery compartment cover.
Once the batteries are installed, the keyboard will automatically power on and start communicating with the receiver. You’ll notice a small LED indicator on the keyboard signaling that it’s active. Now, it’s time to move on to software installation to optimize your keyboard’s functionality.
Downloading and Installing Logitech SetPoint Software
To make the most out of your Logitech K520, you should download and install the Logitech SetPoint software. This software allows you to customize your keyboard’s settings and manage its unique features. Follow these steps:
- Visit the official Logitech website.
- Navigate to the support section and locate the Logitech K520 keyboard page.
- Download the SetPoint software compatible with your operating system.
- Once the download is complete, open the installer and follow the on-screen instructions to install the software.
The installation process is straightforward and user-friendly. After you’ve installed SetPoint, restart your computer to ensure all changes take effect properly. With the software installed, you can now pair your keyboard and customize its settings to suit your needs.

Pairing Your Logitech K520 Wireless Keyboard
Pairing your Logitech K520 with the receiver should be simple if the previous steps have been followed correctly. Here’s how to do it:
- Ensure that the receiver is plugged into your computer and the batteries are correctly installed.
- Turn on the keyboard using the power switch located on the underside.
- The keyboard should automatically connect to the receiver. If it doesn’t, you may need to press the ‘Connect’ button, usually found near the power switch.
- Watch for the ‘Connection’ or ‘Pairing’ notification on your computer screen, indicating that the keyboard has been successfully connected.
Once the keyboard is paired, it’s ready for use. The next step will be to explore and customize your settings using the SetPoint software.
Customizing Keyboard Settings with Logitech SetPoint
Logitech SetPoint software unlocks numerous customization options for your K520 keyboard. Here are some steps to get you started:
- Open the Logitech SetPoint software on your computer.
- Navigate through different tabs to access various features. For example, you can customize the function keys (F-keys) to perform specific tasks.
- Create macros or shortcuts for frequent actions to increase productivity.
- Adjust other settings like the pointer speed for devices that share the same receiver.
Explore these features to tailor the keyboard settings to match your work habits and preferences. Customization makes the keyboard more efficient and suited to your personal needs.
Troubleshooting Common Issues
Sometimes, despite careful setup, you may encounter issues with your Logitech K520. Here are a few common problems and their solutions:
- Keyboard not responding: Ensure the batteries are fresh and correctly installed. Try re-pairing the keyboard with the receiver by following the pairing steps again.
- Keys not registering: Check for obstructions beneath the keys and clean the keyboard. Ensure no software conflicts are blocking keyboard signals.
- Receiver issues: Ensure the receiver is correctly plugged in and try using another USB port. Sometimes, a simple restart of your computer can resolve connectivity issues.
Persisting issues might require you to contact Logitech support for further assistance.
Tips to Enhance Your Logitech K520 Experience
To make the most out of your Logitech K520 wireless keyboard, consider these additional tips:
- Keep the keyboard clean to maintain its responsiveness. Regularly wipe it down with a soft, damp cloth.
- Use the keyboard on a flat surface to avoid unwanted keypresses.
- Take advantage of customization options in the SetPoint software for a more productive work setup.
These tips will help you maintain the efficiency and lifespan of your Logitech K520.
Conclusion
Setting up your Logitech K520 wireless keyboard is a simple process made easier by following the steps in this guide. From unboxing to troubleshooting, each section ensures you get the best out of your new device. Happy typing!
Frequently Asked Questions
How do I know if my Logitech K520 is connected?
You can tell if your Logitech K520 is connected by looking for the small LED indicator on the keyboard. Additionally, your computer should show a notification that the keyboard is recognized.
What should I do if my keyboard isn’t responding?
Ensure the batteries are installed correctly and have power. Re-pair the keyboard to the receiver and check for any software interferences. A computer restart can also help to reset connections.
Can I use Logitech K520 with multiple devices?
No, the Logitech K520 works with a single device using its dedicated USB receiver. For multi-device capability, consider other models in the Logitech lineup that support Bluetooth technology.